A Few Easy, but Effective Photoshop Tips
Photoshop is amazing, it really truly is, and just like your camera, it's a tool. You must learn how to use it first, and for some, that will take time. I am (mostly) self taught in Photoshop, but there is still plenty I don't know about it.
For most photographers I know who are Photoshop magicians, they are also self taught and had spent lots of time reading the Photoshop manual and experimenting. There are also plenty of online videos and tutorials with step by step tips on getting the most out of Photoshop.
One of the most important things to remember is that it's best to get a photo done right in camera. Don't start a session with the thought in mind, "I can just fix this in Photoshop later." Do you want to spend hours upon hours glued to your computer?
Extensive Photoshop will not fix a poorly done session.
Also avoid over editing. Please.
Here are some Photoshop techniques I often use when editing sessions.
I usually do the same things each time I edit a session.
Here is a before and after of how I handle a normal session.
I first open the photo in ACR (Adobe Camera Raw) I adjust brightness, contrast, and temperature. In Photoshop I then do a Hard Layer at about 40% opacity. On most sessions I have been using MCP Fusion Actions. They have so many amazing, easy to use actions that make editing a breeze.
I then do an unsharpen mask to sharpen up the photo, and then do a surface blur to soften the skin.
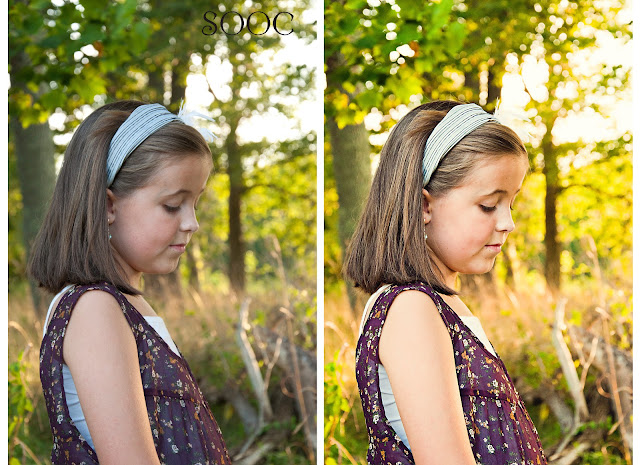
In way of sharpening the photo I use a Unsharpen Mask (found under Filters) amount set to 75, radius set to 6 and threshold set to 6.

Here is close up of the before and after:

Be careful to not OVER edit eyes. This is very easy, and very common. Eyes do not give off a creepy glow. Never. On the above photo, I did nothing fancy to sharpen the eyes other then the unsharpen mask, which I do for every photo. The lighting on this session was absolutely perfect, creating perfect lighting in the eyes.
In editing black and whites -- for each session I give both color and black and white files of each photo to the client.
In how I edit the black and whites fully depends on the session and the subject. I have two black and white styles that I use.
The first is what I call a "rusty" black and white. It's an action I downloaded ages and ages ago for free. I had gone on a searching spree and found tons of free actions. Some were not so great, but this one was one of my faves. Sadly I don't remember where exactly I downloaded it, but thank you to whoever made it! I have downloaded lots of black and white actions, but this is my favorite.

My other black and white edit I do is just a classic black and white. Like I said, I have looked for lots of other actions for black and white's but I have found few I really love, so unless I am using the rusty black and white, I do this one, which is a creation of my own.
After doing my usual edits in Photoshop, I turn the photo black and white
(I am all about the hot keys = alt+ctrl+shift+b= black and white)
I then boost the contrast, usually by about 55 or 65, depending on the photo. And that's it! Super simple, but classic.


Comments
Anyway. Rant over. I love the eyes on the baby shot! Great job capturing the light!